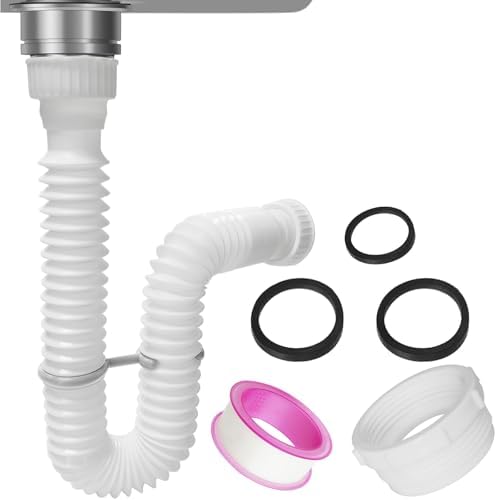
The P-trap is the U-shaped pipe under your sink that holds water to block sewer gases from entering your home. When it leaks, corrodes, or clogs, replacing it is a 15-minute job with no special tools.
STEP 1: Place a Bucket Under the P-Trap
The trap holds water so it will spill when disconnected. Place a bucket directly beneath the trap to catch the water and any debris. Have towels nearby for drips.
STEP 2: Loosen the Slip Nuts and Remove the Old Trap
With your first step complete, the P-trap is held in place by two slip nuts — large plastic or chrome nuts that tighten by hand or with pliers. Loosen both slip nuts by turning counterclockwise. Slide them up and away from the joints, then pull the P-trap down and out. Dump the water into the bucket.
STEP 3: Clean the Connecting Pipe Ends
At this point, you are ready to wipe the tailpiece (the pipe coming down from the sink drain) and the wall drain pipe to remove old crud, corrosion, and any remnants of the old washers. Clean connections make leak-free seals.
STEP 4: Install the New P-Trap
This step ties the earlier work together. slide the new slip nuts and washers onto the tailpiece and wall pipe in the correct order — nut first, then tapered washer with the taper facing the nut. Connect the new P-trap, align the joints, and hand-tighten both slip nuts. Then snug each one an additional quarter turn with slip-joint pliers.
STEP 5: Run Water and Check for Leaks
The finishing touch makes all the difference. turn on the faucet and let water run for 30 seconds while watching every joint. If you see drips, tighten the leaking slip nut another quarter turn. Do not overtighten — plastic nuts crack and chrome nuts strip if forced. A properly seated washer should seal with moderate hand pressure plus a slight turn.
PRO TIPS
Q: How do I replace a P-trap under a sink?
A: Buy a P-trap kit that includes the trap, tailpiece extension, and all necessary washers. Individual parts from different brands sometimes have slightly different diameters that cause leaks. A matched kit eliminates compatibility issues.
Q: Which way does the tapered washer go on a P-trap?
A: If the tailpiece coming from the sink drain is too long, cut it to length with a hacksaw. If it is too short, buy a tailpiece extension. The P-trap must be at the correct height so the arm slopes slightly downward toward the wall — never uphill, which traps water and causes slow draining.
Q: What size P-trap do I need for a kitchen sink vs bathroom?
A: The tapered rubber washer must face the right direction — the tapered side goes toward the nut, the flat side toward the pipe. Installing it backward is the most common cause of leaks in a new P-trap installation.
SUPPLIES NEEDED
Replacement P-trap kit (1-1/4 inch for bathroom, 1-1/2 inch for kitchen)
Slip-joint pliers
Bucket and towels
Hacksaw (if cutting pipes to length)
Clean rag
Products from Amazon

This site contains affiliate links. As an Amazon Associate I earn from qualifying purchases.