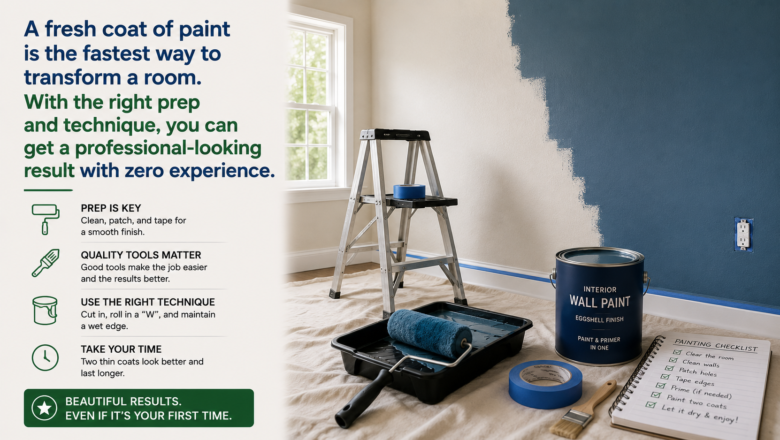
Painting a room is the fastest and most affordable way to transform a space — but the difference between a DIY paint job that looks amateur and one that looks professional comes down to preparation, not painting skill. Professional painters spend 60-70 percent of their time on prep work and 30-40 percent actually painting, which is why their results look flawless. Learning how to paint a room like a professional means mastering the prep — taping, priming, and cutting in — so the rolling goes on smoothly and the finished walls look like they were done by a hired crew.
STEP 1: Prepare the Room Before Opening a Paint Can
Remove all furniture from the room or push it to the center and cover with drop cloths. Remove switch plates, outlet covers, curtain hardware, and anything mounted on the walls. Cover the floor with canvas drop cloths — plastic sheeting is slippery and tears. Fill nail holes and dents with lightweight spackle, let dry, and sand smooth with 120-grit sandpaper. Proper preparation makes the difference between a paint job that looks rushed and one that looks professional.
STEP 2: Apply Painter’s Tape for Clean Edges
With the room prepped, apply painter’s tape along all edges where different surfaces meet — ceiling lines, trim, door frames, window frames, and outlets. Press the tape edge firmly with a putty knife to seal it against paint bleed. This step takes 30-45 minutes but saves hours of frustrating touch-up work and produces the crisp, straight lines that separate professional results from amateur ones.
STEP 3: Prime Before Painting for Even Coverage
This is where things start coming together. apply primer to any patched areas, bare drywall, stains, or dramatic color changes. Primer creates a uniform surface that absorbs paint evenly — without it, patched spots flash through the topcoat and dark previous colors bleed through lighter new colors. For full-room color changes from dark to light, tinting the primer toward the new color reduces the number of topcoats needed.
STEP 4: Cut In the Edges With a Brush Before Rolling
To strengthen your results even more, using a quality 2-inch angled brush, paint a 2-3 inch band along all edges, corners, and areas the roller cannot reach — ceiling line, corners, around trim, and around outlets. This process is called cutting in. Paint one wall’s edges at a time, then immediately roll that wall while the cut-in paint is still wet — this blends the brush strokes with the roller texture for a seamless finish.
STEP 5: Roll the Walls With Proper Technique for Even Coverage
To wrap up and ensure lasting results, load the roller evenly on a paint tray and roll excess on the tray grate. Apply paint in a W or M pattern, then fill in with even, overlapping vertical strokes. Maintain a wet edge — meaning you always roll back into the area you just painted before it dries. Dried edges create visible lap marks. Apply two coats for full, even coverage, allowing the first coat to dry completely before applying the second.
PRO TIPS
Q: How many coats of paint do I need for good coverage?
A: Two coats are standard for almost every paint job — one coat rarely provides full, even coverage regardless of what the paint label claims. If you are covering a dark color with a light one, you may need three coats or a tinted primer plus two topcoats. Applying two thin coats produces a smoother, more durable finish than one thick coat.
Q: What finish or sheen should I choose for interior walls?
A: Eggshell or satin finish is the best choice for most living spaces — it has a subtle sheen that is easy to clean and hides minor wall imperfections. Flat or matte hides imperfections best but is harder to clean. Semi-gloss is durable and easy to clean, making it ideal for kitchens, bathrooms, and trim. Avoid using flat paint in high-traffic areas where walls get touched frequently.
Q: Why does my paint look streaky or uneven after drying?
A: The three most common causes are not maintaining a wet edge (dried edges create lap marks), loading the roller unevenly (too much paint on one side), and not applying enough coats. Maintaining a wet edge means always rolling back into the area you just painted before it dries, ensuring the fresh paint blends with the previous section seamlessly.
SUPPLIES NEEDED
Quality interior paint and primer
9-inch roller frame and covers (3/8-inch nap for smooth walls)
2-inch angled cutting brush
Painter’s tape
Canvas drop cloths
Paint tray with liner
Lightweight spackle and 120-grit sandpaper
Putty knife and step ladder
Products from Amazon

This site contains affiliate links. As an Amazon Associate I earn from qualifying purchases.