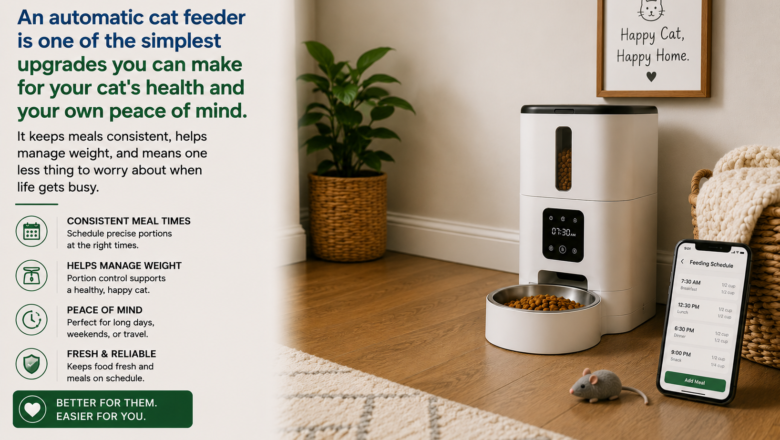
An automatic cat feeder is one of the simplest upgrades you can make for your cat’s health and your own peace of mind. It keeps meals consistent, helps manage weight, and means one less thing to worry about when life gets busy.
STEP 1: Choose the Right Automatic Feeder for Your Cat
There are two main types: gravity feeders that dispense food as the bowl empties, and programmable electric feeders that release precise portions on a set schedule. For most cats, a programmable feeder is the better choice — it gives you real control over portion sizes and meal timing, which is critical for cats that tend to overeat. If you have multiple cats with different dietary needs, look for feeders with multiple compartments or consider one feeder per cat.
STEP 2: Pick the Right Location
Place the feeder on a hard, level surface away from your cat’s water bowl — cats instinctively prefer not to eat right next to their water source. Choose a quiet area where your cat already feels comfortable eating. Avoid placing it near a washing machine, dryer, or anything that makes sudden loud noises, as cats may become afraid to approach it.
STEP 3: Set Up and Program the Feeding Schedule
Most programmable feeders connect to a companion app on your smartphone or have a simple LCD panel for programming. Start by mirroring your cat’s current feeding routine — if you currently feed twice a day at 7am and 6pm, program those exact times first. Consistency matters enormously for cats; a predictable routine reduces anxiety and unwanted begging behavior significantly.
STEP 4: Measure and Set the Correct Portion Size
Check the feeding guidelines on your cat food packaging and confirm the recommended daily amount with your vet, especially if your cat is overweight, underweight, or has a health condition. Divide the daily recommended amount across the number of meals you program. Most feeders let you set portions in increments as small as a tablespoon, giving you precise control over your cat’s calorie intake.
STEP 5: Introduce Your Cat to the Feeder Gradually
Do not switch to the automatic feeder cold turkey. For the first few days, place the feeder in your cat’s usual eating spot with the lid open and food visible so your cat can investigate it on their own terms. Let the feeder dispense a few times while you are present so your cat associates the sound with food rather than being startled by it alone. Most cats adapt within 3 to 5 days.
STEP 6: Keep the Feeder Clean
Wash the food bowl and any removable parts with warm soapy water at least once a week — the same frequency you would clean a regular bowl. Dry all parts thoroughly before reassembling, as moisture in the feeder mechanism can cause food to clump and jam the dispenser. Wipe down the exterior and the dispensing chute with a damp cloth regularly.
STEP 7: Set Up the Backup Power Option
Most quality programmable feeders run on both AC power and AA batteries as a backup. Always keep fresh batteries installed even if the feeder is plugged in — a power outage should never mean a missed meal. Check and replace the backup batteries every 6 months.
PRO TIP
Q: Are automatic feeders worth it for travel and late nights?
A: Genuinely life-changing for both. It’s worth pairing one with a pet camera so you can check in visually and confirm your cat is eating well while you’re away.
Q: Do any feeders combine both features?
A: Yes — some feeders even have built-in cameras and two-way audio, so you can see, speak to, and feed your cat from anywhere in the world.
Q: My cat eats too fast and sometimes vomits — any fix for that?
A: Look for a feeder with a slow-feed maze bowl attachment, or program 3 to 4 smaller meals throughout the day instead of 2 large ones. This alone solves the problem for most cats, without any medication or special food required.
SUPPLIES NEEDED
Programmable automatic cat feeder
Dry or semi-moist cat food compatible with the feeder
AA backup batteries
Smartphone for app-connected feeders
Pet camera optional but recommended for travel
Measuring cup for portion calibration
Products from Amazon

This site contains affiliate links. As an Amazon Associate I earn from qualifying purchases.
Quick Cat Feeder Comparison
| Cat Feeder | Best for | Capacity | Wi-Fi | Portion Control |
| PETLIBRO Automatic Cat Feeder | Most owners | 5L | ✅ | ✅ meals/day up to 10 |
| VOLUAS Automatic Cat Feeder | Budget | 4L | ❌ | ✅ meals/day up to 4 |
| ONEISALL Dual Automatic Cat Feeder | Two Cats | 5L | ✅ | ✅ meals/day up to 6 |


